To create this shape I had to;
1. Drag the letters to the red base
2. Adjust the size of the red base so it is easier to place the letters
3. Using the black dot on the right side edge of the base resize the red base to fit the length of the text
4. Using the letters I spelled my name on the red base, then I changed the colours or the letters as well as the colour of the base.
5. Delete all the remaining letters
6. Group all the objects together using the group button in the toolbar menu
The skill I learnt in this lesson was to create my own personal key ring. This lesson was a bit more challenging because it had more steps to follow but this lesson as well as made you use your own creativity a lot more than any other lesson I did. I enjoyed this lesson very much and I'm very proud of my work.
TinkerCAD Lesson 5: Die on the workplane result
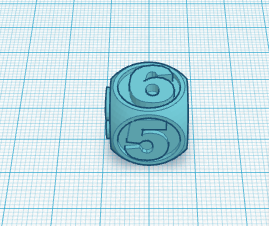
To create this shape I had to;
1. Using the workplane tool just above the shapes, drag and drop the workplane where the blue + symbol is
2.Move the workplane on to the front side of the die
3. Go to the number shapes by scrolling down the shape list or click the 1 icon
4. Find the number 5 shape and drag it to the area outlined in orange
5. Scale the number 5 down to a height of 1 mm to the area highlighted in orange
6. Repeat the steps to place number 6 on top of the die
7. Drag the 6 to the area outlined in orange
8. Scale it smaller to the height of 1 mm
9. Group all the objects together

The skill I learnt in this lesson was to make the workplane work for you. This was a lot more complicated and I found it a bit difficult. But in the end I worked out how to do it. This was my last lesson on TinkerCAD so now I'm looking forward to create more shapes and be able to use my creativity more to create amazing things

No comments:
Post a Comment